
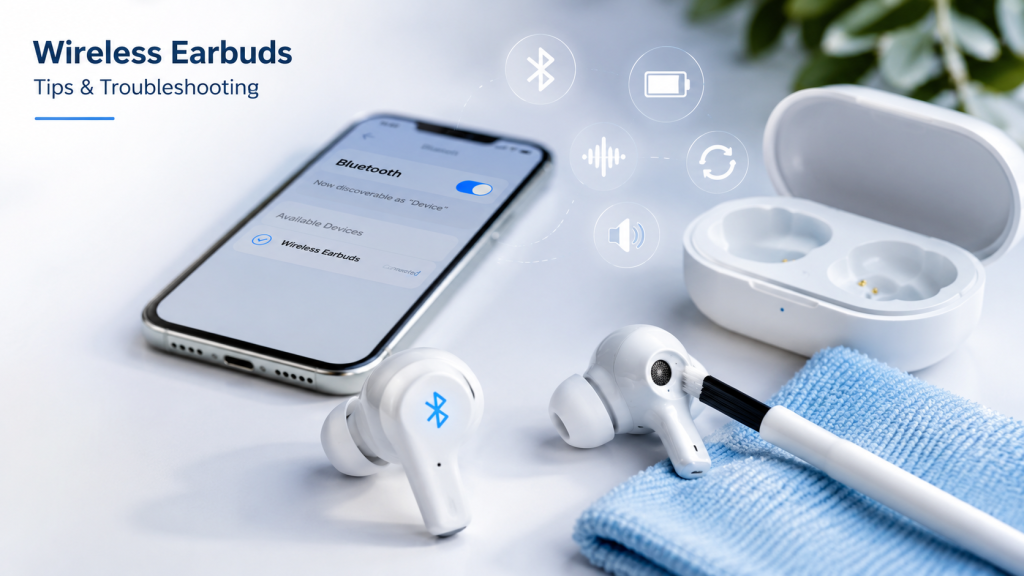
Wireless earbuds have transformed the way we enjoy music, attend virtual meetings, watch videos, and even take phone calls. Their compact design and wireless convenience make them one of the most popular audio accessories today. Whether you’re commuting, exercising, studying, or relaxing at home, a reliable pair of earbuds can make every listening experience more enjoyable.
Despite their convenience, wireless earbuds are not immune to problems. You may struggle to connect them to a new device, notice that one earbud suddenly stops working, experience poor sound quality, or find that the battery drains faster than expected. Dirt, earwax, outdated firmware, and Bluetooth interference can all affect performance over time. The good news is that most of these issues are easier to fix than many people realize.
By the end of this guide, you’ll have the knowledge to troubleshoot most wireless earbud problems without rushing to buy a replacement.
What Are Wireless Earbuds and How Do They Work?

Wireless earbuds rely on Bluetooth technology to communicate with your phone, tablet, laptop, or other compatible devices. Inside each earbud are several tiny components that work together, including a rechargeable battery, Bluetooth antenna, speaker driver, microphone, touch controls, and a small circuit board. The charging case not only stores the earbuds but also recharges them whenever they are placed inside.
Every time you remove your earbuds from the charging case, they automatically attempt to reconnect to the last paired device. If the device is nearby and Bluetooth is enabled, the connection usually happens within a few seconds. This seamless process makes wireless earbuds incredibly convenient, but it also means that any interruption—such as low battery, outdated software, or signal interference—can affect their performance.
Understanding these basics makes troubleshooting much easier because many problems have simple explanations and equally simple solutions.
Why Wireless Earbuds Sometimes Stop Working Properly
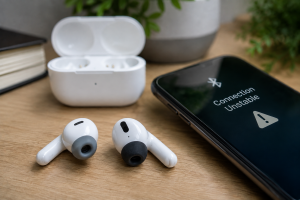
Many users assume their earbuds are broken as soon as they experience connection issues or poor sound quality. In reality, permanent hardware failure is much less common than software or maintenance-related problems.
Bluetooth devices communicate using radio signals, which can occasionally be interrupted by nearby wireless devices, thick walls, or even crowded public spaces. Batteries naturally lose efficiency over time, while dust and earwax gradually build up around the speaker mesh and charging contacts. Even something as simple as skipping a firmware update can lead to pairing errors or unstable connections.
Instead of replacing your earbuds immediately, it’s worth identifying the actual cause of the problem. A few minutes of troubleshooting often restores them to normal operation.
Common Wireless Earbud Problems and Their Solutions
Before diving into individual troubleshooting methods, it’s helpful to understand the relationship between common symptoms and their likely causes.
| Problem | Most Likely Cause | Recommended Solution |
|---|---|---|
| Earbuds won’t pair | Bluetooth conflict or pairing mode inactive | Forget the device and pair again |
| Audio keeps disconnecting | Bluetooth interference or low battery | Recharge earbuds and stay within range |
| One earbud has no sound | Charging issue, sync error, or clogged speaker | Clean, recharge, or reset the earbuds |
| Low volume | Earwax buildup or incorrect volume settings | Clean the speaker mesh and adjust audio settings |
| Battery drains quickly | Aging battery or outdated firmware | Update firmware and follow proper charging habits |
As you continue reading, each of these issues will be explained in greater detail with step-by-step solutions.
How to Pair Wireless Earbuds the Right Way
Learning How to Pair Wireless Earbuds correctly is the first step toward avoiding many common Bluetooth issues. Although different manufacturers may use slightly different methods, the overall process is nearly identical across most brands.
Start by fully charging both the earbuds and their charging case. Pairing problems often occur simply because one earbud doesn’t have enough battery power to enter pairing mode. Once charged, remove both earbuds from the case. Most modern earbuds automatically enter pairing mode the first time they are powered on. If yours do not, press and hold the pairing button or touch controls until the indicator light begins flashing.
Next, open the Bluetooth settings on your smartphone, tablet, or computer and enable Bluetooth if it isn’t already turned on. Within a few seconds, your earbuds should appear in the list of available devices. Tap their name and wait for the confirmation message indicating that the connection has been established.
After pairing, test the connection by playing music or a short video. Listen carefully to ensure both earbuds produce clear audio and respond properly to touch controls. If everything works as expected, the pairing process is complete.
Why Wireless Earbuds Pairing Fails
Pairing failures can happen even when you follow every instruction correctly. In many cases, the problem isn’t the earbuds themselves but the connection history stored on your device.
For example, if your earbuds are still connected to another phone or laptop nearby, they may automatically reconnect to that device instead of entering pairing mode. Deleting the old Bluetooth connection and pairing again usually solves the issue.
Another common reason is low battery power. When battery levels become critically low, some earbuds disable pairing mode to preserve energy. Fully charging them before attempting another connection is often enough to fix the problem.
Software glitches may also interfere with Bluetooth communication. Restarting both the earbuds and the device you’re trying to connect can refresh the Bluetooth system and eliminate temporary bugs.
Tips for a More Reliable Bluetooth Connection
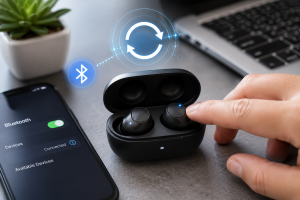
Once your earbuds are paired successfully, maintaining a stable connection becomes much easier if you develop a few good habits.
Keep your phone within a reasonable distance of your earbuds whenever possible. Bluetooth generally performs best within about ten meters without major obstacles between the two devices. Thick concrete walls, elevators, crowded train stations, and areas filled with wireless equipment can weaken the signal and cause occasional interruptions.
It’s also helpful to install firmware updates released by the manufacturer. These updates often improve Bluetooth stability, battery performance, and compatibility with newer smartphones.
Another simple habit is storing your earbuds inside their charging case whenever they’re not in use. Besides protecting them from dust and accidental damage, the case keeps the batteries topped up so they’re always ready for your next listening session.
Finally, avoid pairing your earbuds with too many devices at once. Some models can remember multiple Bluetooth connections, but switching constantly between phones, tablets, and laptops may occasionally create conflicts. Disconnecting unused devices helps maintain a faster and more reliable connection.
How to Connect Wireless Earbuds to Any Device
Once you’ve completed the initial pairing process, reconnecting your earbuds should be quick and effortless. Most modern wireless earbuds automatically recognize previously paired devices, allowing them to connect within seconds after you remove them from the charging case. However, things don’t always go as planned. A new phone, an operating system update, or a Bluetooth conflict can interrupt the connection and leave you wondering why your earbuds won’t work.
Understanding How to Connect Wireless Earbuds correctly on different devices can save time and eliminate unnecessary frustration.
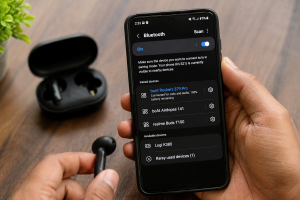
Connecting to an Android Phone
Android phones may have slightly different menu layouts depending on the manufacturer, but the connection process remains largely the same. After enabling Bluetooth in the settings menu, remove your earbuds from the charging case. If they have already been paired before, they should reconnect automatically. If not, place them into pairing mode and select their name from the list of available Bluetooth devices.
If the connection repeatedly fails, turning Bluetooth off for a few seconds before enabling it again often refreshes the wireless connection. Restarting the phone can also clear temporary software conflicts that prevent successful pairing.
Connecting to an iPhone or iPad
Apple devices are designed to make Bluetooth connections simple and reliable. Open the Bluetooth settings, make sure Bluetooth is enabled, and place your earbuds into pairing mode if they don’t reconnect automatically. Once your earbuds appear in the available device list, tap their name and wait for the confirmation message.
If you’re using AirPods, simply opening the charging case near your iPhone will usually trigger an automatic setup window. Other Bluetooth earbuds follow the standard Bluetooth pairing process.
Connecting to a Windows Computer
Wireless earbuds have become increasingly popular for video conferences, online classes, and gaming. Connecting them to a Windows computer is straightforward, although occasional driver issues can cause problems.
Enable Bluetooth from the Windows settings, choose the option to add a new Bluetooth device, and place your earbuds into pairing mode. Once Windows detects them, complete the connection by selecting the device name.
If Windows cannot find the earbuds, updating the Bluetooth driver or restarting the Bluetooth service often resolves the issue.
Connecting to a Mac
Mac users can connect wireless earbuds through the Bluetooth menu in System Settings. After enabling Bluetooth, place the earbuds into pairing mode and select them from the available devices. Within a few moments, the connection should be established.
If the earbuds fail to appear, removing any previous Bluetooth profile associated with the earbuds and pairing them again usually solves the problem.
Why Bluetooth Connections Keep Dropping
Many users experience earbuds disconnecting unexpectedly, even after a successful connection. Fortunately, this problem is usually related to environmental conditions rather than defective hardware.
Bluetooth signals are relatively stable, but they can weaken when there are multiple wireless devices nearby. Busy offices, airports, shopping malls, and apartment buildings often contain dozens of Bluetooth and Wi-Fi signals competing for bandwidth. As a result, audio may briefly cut out or the earbuds may disconnect entirely.
Physical obstacles also play a role. Carrying your phone in a backpack or leaving it in another room while wearing earbuds increases the chance of signal interruption. Keeping your phone nearby with a clear line of sight helps maintain a more reliable connection.
Battery health is another important factor. As batteries age, they become less capable of maintaining stable power output, which may lead to unexpected disconnects during use. Regular charging and proper battery care can significantly reduce these issues.
Why Is One Wireless Earbud Not Working?
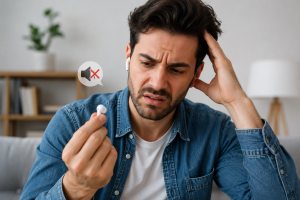
Among all Bluetooth earbud problems, One Earbud Not Working is probably the most common. Sometimes the left earbud plays perfectly while the right remains silent. In other cases, one earbud may produce extremely low volume instead of no sound at all.
At first glance, it may seem like the earbud has completely failed. Fortunately, that’s rarely the case. Most single-earbud problems are caused by charging issues, Bluetooth synchronization errors, blocked speaker grills, or incorrect audio settings.
Understanding the difference between a software problem and a hardware failure is the key to finding the right solution.
Check Your Wireless Earbuds First
Whenever only one earbud stops working, begin with the easiest possible checks before assuming something is broken.
First, return both earbuds to the charging case for several minutes. Remove them together and check whether both earbuds power on. If only one earbud shows an indicator light, the other may not have charged correctly.
Next, inspect the charging contacts inside the case. Even a thin layer of dust or skin oil can prevent proper charging. Gently wiping the contacts with a dry microfiber cloth often restores charging immediately.
If the problem persists, reconnect the earbuds to your device by deleting the existing Bluetooth connection and pairing them again. This simple step resolves many synchronization issues that occur after software updates or unexpected disconnects.
Why Wireless Earbuds Speaker Gets Blocked
One overlooked cause of reduced audio is earwax accumulation.
Over time, tiny particles of earwax, dust, and lint collect on the protective speaker mesh. Instead of blocking sound completely, this buildup usually causes one earbud to sound quieter than the other. Many people mistakenly believe the speaker is damaged when it simply needs cleaning.
Comparing both earbuds side by side often reveals the problem. If one speaker grille appears darker or more clogged than the other, careful cleaning may restore the original sound quality.
Later in this guide, you’ll learn How to Clean Earwax from Earbuds safely without damaging delicate internal components.
When to Reset Wireless Earbuds
If cleaning and reconnecting don’t solve the problem, your earbuds may have lost synchronization with each other.
This occasionally happens after interrupted firmware updates, battery drain, or failed pairing attempts. A complete reset restores the factory settings and forces both earbuds to establish a fresh Bluetooth connection.
Many users are surprised to discover that a factory reset solves problems they assumed required replacing the earbuds altogether.
In the next section, we’ll explain How to Reset Bluetooth Earbuds safely, along with the differences between restarting, reconnecting, and performing a full factory reset.
Signs That the Problem May Be Hardware-Related
Although most issues can be solved through troubleshooting, there are situations where physical damage is the likely cause.
The table below can help you distinguish between software issues and hardware failure.
| Symptom | Possible Cause | Recommended Action |
|---|---|---|
| One earbud occasionally reconnects | Bluetooth synchronization issue | Reset and pair again |
| One earbud has very low sound | Earwax blocking the speaker | Clean the speaker mesh carefully |
| Earbud does not charge at all | Dirty charging contacts or battery issue | Clean contacts and test another charging cable |
| No indicator light appears | Internal battery or hardware failure | Contact the manufacturer or service center |
| Distorted or crackling sound | Moisture or damaged speaker driver | Dry the earbud completely and inspect for physical damage |
Understanding these warning signs helps you decide whether additional troubleshooting is worthwhile or if professional repair is necessary.
How to Reset Bluetooth Earbuds and Restore Normal Performance
Even the best wireless earbuds can occasionally stop behaving as expected. They may refuse to pair with your phone, disconnect randomly, or fail to synchronize with each other. When basic troubleshooting doesn’t solve the problem, a factory reset is often the most effective solution.
Learning How to Reset Bluetooth Earbuds is an essential skill because it clears temporary software glitches and restores the earbuds to their original factory settings. Think of it as giving your earbuds a fresh start. Instead of carrying over old Bluetooth information or corrupted settings, the earbuds create a brand-new connection with your device.
A reset does not damage your earbuds or erase music from your phone. It simply removes stored Bluetooth pairings and restores the internal software to its default state.
When Should You Reset Your Bluetooth Earbuds?
Resetting your earbuds isn’t something you need to do regularly. However, there are several situations where it becomes the best troubleshooting option.
If your earbuds repeatedly fail to connect after multiple pairing attempts, a reset is worth trying. The same applies when only one earbud connects, audio cuts in and out without explanation, touch controls stop responding, or your phone recognizes the earbuds but no sound plays through them.
Many users also perform a reset before pairing their earbuds with a new phone or after installing a major firmware update. Starting with a clean Bluetooth connection helps avoid compatibility issues that may develop over time.
The General Reset Process
Although every manufacturer uses a slightly different reset method, the overall process follows the same basic principle.
Begin by placing both earbuds inside the charging case and ensuring they have sufficient battery power. Most brands require the earbuds to remain inside the case while the reset is performed.
Next, press and hold the reset or pairing button for several seconds until the LED indicator begins flashing in a different pattern. On touch-control models, you may need to touch and hold both earbuds simultaneously instead of pressing a physical button.
Once the lights indicate the reset is complete, remove the earbuds from the case, delete the previous Bluetooth connection from your phone, and pair them again as if they were brand new.
Although the exact timing differs between brands, following the manufacturer’s instructions ensures the reset completes successfully.
Restart vs. Reconnect vs. Reset
Many people use these three terms interchangeably, but they solve different problems. Understanding the difference helps you avoid unnecessary troubleshooting.
| Method | What It Does | Best Used When |
|---|---|---|
| Restart | Powers the earbuds off and back on | Minor software glitches or temporary freezing |
| Reconnect | Creates a fresh Bluetooth connection | Pairing problems or unstable connections |
| Factory Reset | Restores factory settings and removes saved pairings | Persistent connection issues or synchronization failures |
Whenever a simple restart fixes the issue, there’s no need to perform a complete reset. Saving factory resets for more serious problems reduces unnecessary setup time.
Keeping Your Earbuds Updated
Resetting your earbuds solves many software problems, but keeping the firmware updated helps prevent them from happening again.
Manufacturers frequently release updates that improve Bluetooth stability, battery efficiency, microphone performance, and overall reliability. Installing these updates also improves compatibility with newer smartphones and operating systems.
Most premium earbuds have a companion mobile app that notifies users whenever a firmware update becomes available. Checking for updates every few months is a simple habit that can significantly improve long-term performance.
How to Clean Earwax from Earbuds Safely
Regular cleaning is one of the easiest ways to maintain excellent sound quality and extend the lifespan of your earbuds. Over time, earwax, dust, skin oils, and pocket lint gradually collect around the speaker mesh and charging contacts. This buildup doesn’t happen overnight, but eventually it can reduce volume, affect microphone clarity, or even prevent the earbuds from charging properly.
Knowing How to Clean Earwax from Earbuds safely is just as important as learning how to pair or reset them. Cleaning them incorrectly can damage delicate components, while cleaning them properly keeps them performing like new.
Why Earwax Affects Sound Quality
Earwax is a natural substance that protects the ear canal, but it can become a problem when it accumulates on earbud speakers.
Because wireless earbuds sit directly inside the ear, small amounts of wax gradually transfer to the speaker mesh. Over time, the tiny openings that allow sound to pass become partially blocked. Instead of hearing loud, balanced audio, you may notice reduced volume, muffled voices, or one earbud sounding quieter than the other.
Many users assume their earbuds are failing when the real issue is simply a clogged speaker grille.
The Safest Cleaning Method
Cleaning wireless earbuds doesn’t require expensive equipment. The goal is to remove debris gently without forcing moisture or sharp objects into the speaker.
Start by removing the silicone ear tips if your earbuds include them. Wash the ear tips separately with mild soap and warm water, then allow them to dry completely before reinstalling them.
Next, use a soft, dry brush or a clean microfiber cloth to remove dust and loose debris from the speaker mesh. If stubborn earwax remains, lightly dampen a cotton swab with isopropyl alcohol and carefully wipe around the outer surface. Avoid allowing liquid to enter the speaker openings.
Before placing the earbuds back into the charging case, make sure they are completely dry.
Taking a few extra minutes during cleaning can prevent accidental damage and improve both sound quality and charging performance.
Cleaning Mistakes to Avoid Wireless Earbuds
Good intentions can sometimes lead to expensive mistakes. Many damaged earbuds have been cleaned using methods that should never be used.
The following comparison highlights the difference between safe and unsafe cleaning practices.
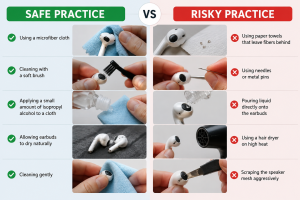
| Safe Practice | Risky Practice |
|---|---|
| Using a microfiber cloth | Using paper towels that leave fibers behind |
| Cleaning with a soft brush | Using needles or metal pins |
| Applying a small amount of isopropyl alcohol to a cloth | Pouring liquid directly onto the earbuds |
| Allowing earbuds to dry naturally | Using a hair dryer on high heat |
| Cleaning gently | Scraping the speaker mesh aggressively |
Following these simple precautions protects the sensitive speaker drivers and charging contacts from unnecessary damage.
Building Better Maintenance Habits
Troubleshooting becomes much less necessary when earbuds receive regular care.
Cleaning the speaker mesh every few weeks helps prevent gradual sound loss, while wiping the charging contacts keeps the batteries charging efficiently. Storing the earbuds inside their charging case protects them from dust and accidental drops, and avoiding extreme temperatures helps preserve battery health.
Many users wait until something stops working before thinking about maintenance. In reality, a few minutes of routine care can prevent many of the problems discussed throughout this guide.
Can Earbuds Cause Ear Infection?
Wireless earbuds are designed for comfort and convenience, but many users wonder whether wearing them every day could affect their ear health. The short answer is yes—wireless earbuds can contribute to ear infections, but the earbuds themselves are not usually the direct cause. Instead, infections often develop because of poor hygiene, prolonged use, or sharing earbuds with other people.
Your ears naturally produce earwax, which helps trap dust, bacteria, and other small particles before they reach the inner ear. When earbuds are worn for long periods, they can reduce airflow inside the ear canal and create a warm, slightly moist environment. If the earbuds are dirty or covered with bacteria, this environment may increase the risk of irritation or infection.
Fortunately, this doesn’t mean you should stop using wireless earbuds. With proper cleaning habits and sensible listening practices, you can enjoy your earbuds safely while protecting your hearing and overall ear health.
Signs That Your Wireless Earbuds May Be Affecting Your Ear Health
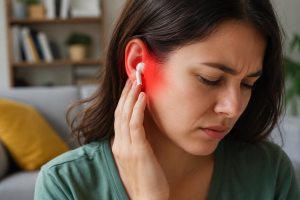
Most people use earbuds without experiencing any health problems. However, if you notice discomfort after using them, it’s worth paying attention to your symptoms.
Persistent itching, redness, swelling around the ear canal, unusual discharge, pain while wearing earbuds, or temporary hearing changes may indicate irritation or an infection. These symptoms are not always caused by earbuds, but continuing to use them without addressing the issue could make the condition worse.
If symptoms last more than a few days or become severe, it’s best to stop using the earbuds temporarily and seek advice from a healthcare professional.
How to Reduce the Risk of Ear Infections
Preventing ear infections is much easier than treating them. A few simple habits can significantly reduce your risk while also improving the lifespan of your earbuds.
Cleaning your earbuds regularly removes earwax, dust, and bacteria before they accumulate. Washing removable silicone ear tips and allowing them to dry completely before reattaching them also helps maintain better hygiene.
It’s equally important to avoid sharing earbuds with other people. Even close friends or family members can transfer bacteria through shared earbud tips. If sharing is unavoidable, cleaning and disinfecting the earbuds first is strongly recommended.
Giving your ears occasional breaks is another healthy habit. Wearing earbuds continuously for several hours traps heat and moisture inside the ear canal. Removing them for short breaks allows air to circulate naturally and keeps your ears more comfortable.
Finally, keeping the volume at a moderate level not only protects your hearing but also encourages shorter listening sessions, giving your ears regular opportunities to recover.
Healthy Earbud Habits vs. Poor Habits
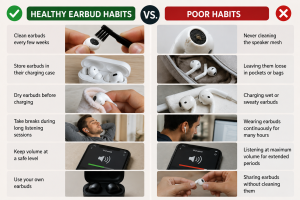
Developing good habits is one of the easiest ways to avoid both technical issues and ear health problems.
| Healthy Habits | Habits to Avoid |
|---|---|
| Clean earbuds every few weeks | Never cleaning the speaker mesh |
| Store earbuds in their charging case | Leaving them loose in pockets or bags |
| Dry earbuds before charging | Charging wet or sweaty earbuds |
| Take breaks during long listening sessions | Wearing earbuds continuously for many hours |
| Keep volume at a safe level | Listening at maximum volume for extended periods |
| Use your own earbuds | Sharing earbuds without cleaning them |
Small daily habits like these not only improve hygiene but also help your earbuds last longer.
Wireless Earbuds FAQs
Why won’t my wireless earbuds connect?
This is usually caused by Bluetooth conflicts, low battery, or an interrupted pairing process. Restarting both the earbuds and your device, deleting the previous Bluetooth connection, and pairing again often solves the problem.
Why is only one earbud producing sound?
If One Earbud Not Working becomes an issue, check whether both earbuds are fully charged. Cleaning the charging contacts, reconnecting the Bluetooth connection, or performing a factory reset often restores normal operation.
How often should I clean my earbuds?
For everyday use, cleaning your earbuds every two to four weeks is generally sufficient. If you exercise frequently or use them for several hours each day, more frequent cleaning will help maintain both hygiene and sound quality.
Is it safe to sleep while wearing wireless earbuds?
Occasionally falling asleep with earbuds is unlikely to cause serious problems, but wearing them throughout the night can create pressure inside the ear canal and reduce airflow. It may also increase the chance of irritation or accidentally damaging the earbuds while sleeping.
Does resetting earbuds delete music or files?
No. Learning How to Reset Bluetooth Earbuds simply removes stored Bluetooth pairing information and restores factory settings. Your music, playlists, and files remain safely stored on your phone or computer.
How long should wireless earbuds last?
The lifespan depends on build quality, battery health, and maintenance. With regular cleaning, proper charging habits, and careful handling, quality wireless earbuds can provide reliable performance for several years.
Key Takeaways
Wireless earbuds have become an essential part of modern life, offering the freedom to enjoy music, take calls, attend meetings, and stay connected without tangled cables. Like any electronic device, however, they perform best when they are used correctly and maintained regularly.
The key takeaway is that most earbud problems don’t require expensive repairs or replacement. Simple steps such as keeping the earbuds clean, updating their firmware, charging them properly, and maintaining a stable Bluetooth connection can solve many of the issues users experience every day.
By combining good maintenance habits with the troubleshooting techniques covered in this guide, you’ll enjoy clearer sound, more reliable connections, longer battery life, and a more comfortable listening experience for years to come.