
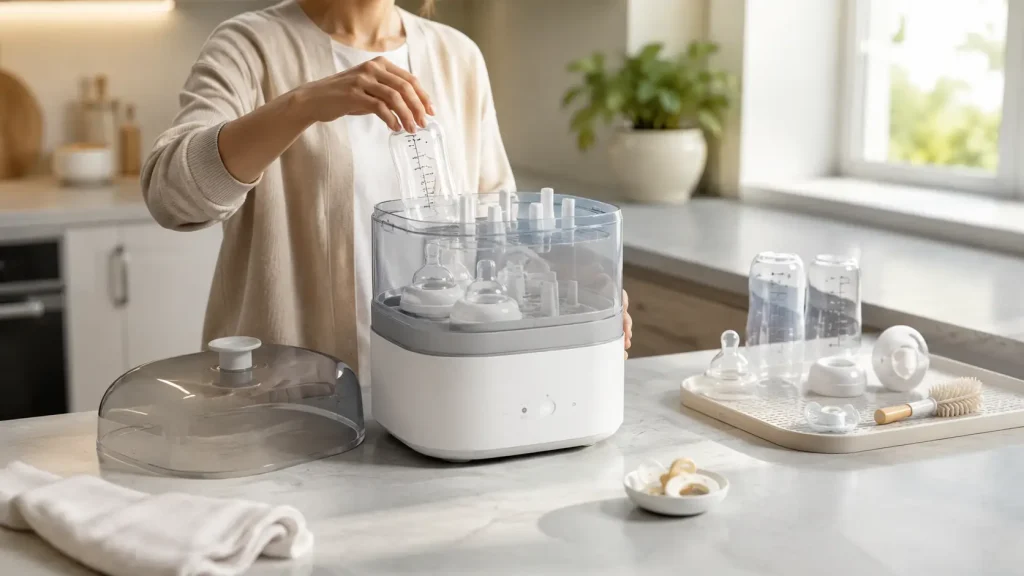
Learning how to sterilize baby bottles properly is one of the most important steps in protecting your baby’s health. In fact, although washing bottles removes milk residue and visible dirt, sterilization goes a step further by killing bacteria, viruses, and other harmful microorganisms that ordinary washing may leave behind.
Newborn babies have developing immune systems, making them more vulnerable to infections caused by contaminated feeding equipment. Therefore, healthcare professionals recommend baby bottle sterilization methods for newborn safety regularly, especially during the first few months of life.
Whether you’re using expressed breast milk or infant formula, following the correct sterilization process helps keep feeding equipment hygienic. As a result, it significantly reduces the risk of stomach infections.
In this complete guide, you’ll learn how to sterilize baby bottles properly, discover different baby bottle sterilization methods, understand when sterilization is necessary, and avoid common mistakes that many parents unknowingly make.
Why Proper Baby Bottle Sterilization Methods Matter for Infant Health
Sterilization provides an extra level of protection beyond regular washing. Even after bottles appear clean, invisible bacteria can remain on bottle surfaces and inside bottle nipples.
Because of this, proper baby bottle sterilization techniques for hygiene and safety help:
- Kill harmful bacteria and viruses
- Protect newborns from infections
- Reduce stomach illnesses
- Keep feeding equipment hygienic
- Prevent mold growth
- Provide safer bottle feeding every day
In addition, sterilizing bottles before first use removes bacteria that may have accumulated during manufacturing, packaging, or shipping.
When to Sterilize Baby Bottles Properly for Newborns and Infants
Many parents ask whether sterilization is necessary after every feeding. However, the answer depends on your baby’s age, health, and local water quality.
Healthcare professionals generally recommend when to sterilize baby bottles properly at different stages:
- Before the first use
- Daily for newborns under 3 months
- After illness
- For premature babies
- For babies with weakened immune systems
- Whenever bottles have been stored for long periods
Even if you use a dishwasher with a sanitizing cycle, regular sterilization offers additional protection for younger infants.
Supplies Needed for Baby Bottle Sterilization Properly at Home
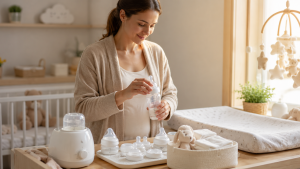
Before beginning the sterilization process, gather these essentials:
- Baby bottles
- Bottle nipples
- Bottle collars
- Bottle caps
- Bottle cleaning brush
- Mild baby-safe dish soap
- Large pot (for boiling)
- Electric steam sterilizer (optional)
- Microwave sterilizer (optional)
- UV sterilizer (optional)
- Clean drying rack
- Clean kitchen tongs
To ensure safety, having dedicated cleaning tools helps prevent cross-contamination from other kitchen items.
How to Sterilize Baby Bottles Properly Step by Step (Complete Guide)
Step 1: Wash Your Hands Before Baby Bottle Sterilization
Before touching any feeding equipment, wash your hands thoroughly with soap and warm water for at least 20 seconds. This is important because clean hands help prevent transferring bacteria to freshly cleaned bottles.
Step 2: Disassemble Bottles for Proper Sterilization
Separate every removable component, including:
- Bottle
- Nipple
- Collar
- Valve
- Cap
- Anti-colic vent (if applicable)
By doing this, you ensure that no hidden milk residue or bacteria remain trapped inside small spaces.
Step 3: Wash Baby Bottles Thoroughly Before Sterilizing
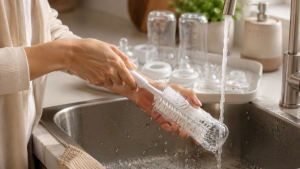
Before sterilization, wash every bottle component with warm water and a mild, fragrance-free dish soap. Then, use a dedicated bottle brush to scrub the inside of the bottle and a smaller brush to clean nipples, collars, valves, and other small parts. Sterilization works best on bottles that are already clean, so never skip this step.
Step 4: Rinse All Bottle Parts Completely Before Sterilization
After washing, rinse every bottle part under clean running water to remove all traces of soap. Otherwise, soap residue can affect milk taste and reduce hygiene if left behind.
For the best results:
- Rinse each bottle individually
- Check the nipple holes for trapped soap
- Shake off excess water before sterilizing
Best Baby Bottle Sterilization Methods Properly Explained
Different sterilization methods work well depending on your needs and available equipment.
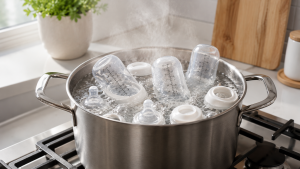
Method 1: Boiling Water Baby Bottle Sterilization Method
Boiling is one of the simplest and most affordable ways to sterilize baby bottles.
How to Do It
- Fill a large pot with enough water to cover every bottle part.
- Bring the water to a rolling boil.
- Carefully place the bottles, nipples, and accessories into the boiling water.
- Boil for 5–10 minutes.
- Remove the items using clean tongs.
- Place them upside down on a clean drying rack to air dry.
On the one hand, this method is very effective; however, frequent boiling may wear out some bottle parts over time.
Method 2: Electric Steam Baby Bottle Sterilizer Method
An electric steam sterilizer is one of the easiest options for busy parents. It uses high-temperature steam to destroy bacteria without chemicals.
In addition, it offers several benefits:
- Fast and convenient
- Large capacity
- Automatic shut-off
- Suitable for daily use
Simply arrange the cleaned bottles according to the manufacturer’s instructions, add the recommended amount of water, and start the sterilization cycle.
Method 3: Microwave Baby Bottle Sterilization Method
Microwave sterilizers are compact and ideal for families with limited kitchen space.
Steps for Microwave Sterilizing Baby Bottles
- Add the recommended amount of water
- Place clean bottles inside the sterilizer
- Heat according to the manufacturer’s instructions
- Allow the sterilizer to cool before opening
However, always check that your bottles are microwave-safe before using this method.
Method 4: UV Baby Bottle Sterilization Method for Modern Parents
UV sterilizers use ultraviolet light to eliminate germs without steam or boiling water. Many parents prefer this method because bottles come out dry and ready to use.
Moreover, UV sterilization offers:
- No water required
- No chemicals
- Bottles dry during the process
- Quick and convenient
Sterilization Method Comparison for Baby Bottles
| Method | Time | Ease of Use | Cost | Best For |
|---|---|---|---|---|
| Boiling Water | 5–10 min | Easy | Low | Occasional use |
| Electric Steam Sterilizer | 6–12 min | Very Easy | Medium | Daily use |
| Microwave Sterilizer | 3–8 min | Easy | Low–Medium | Small families |
| UV Sterilizer | 5–15 min | Very Easy | High | Modern households |
How Often to Sterilize Baby Bottles Properly by Age
The frequency depends on your baby’s age and health.
- Newborns (0–3 months): Sterilize daily.
- Premature babies: Sterilize after every use unless advised otherwise by your healthcare provider.
- Babies over 3 months: Continue washing bottles thoroughly and sterilize regularly, especially if your local water quality is uncertain or after illness.
- Before first use: Always sterilize every new bottle and feeding accessory.
Common Mistakes in Baby Bottle Sterilization
Even careful parents can make small mistakes that reduce the effectiveness of sterilization. Therefore, avoiding these common errors helps keep your baby’s feeding equipment as safe as possible.
Skipping the Washing Step Before Sterilization
Sterilization does not remove dried milk or formula residue. So, always wash bottles thoroughly before sterilizing them.
Touching Sterilized Bottles with Unwashed Hands
Clean hands are essential. Otherwise, germs can transfer back onto freshly sterilized bottles.
Not Taking Bottles Apart Before Sterilizing Properly
Every removable part, including nipples, collars, valves, and caps, should be sterilized separately.
Using Damaged Bottles During Sterilization
Cracked bottles or torn nipples can trap bacteria and should be replaced immediately.
Storing Bottles While Still Wet After Sterilization
Moisture encourages bacterial growth. Therefore, allow bottles to air dry completely before storing them.
Expert Tips for Sterilizing Baby Bottles Properly Every Day
Following a few simple habits can make sterilization easier and more effective.
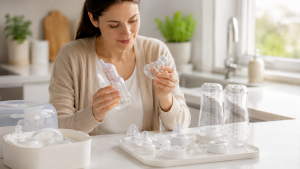
- Wash bottles immediately after every feeding.
- Sterilize all new bottles before first use.
- Replace worn nipples and bottle brushes regularly.
- Store sterilized bottles in a clean, closed cabinet.
- Follow the manufacturer’s cleaning instructions.
- Use filtered or clean drinking water whenever possible.
- Check bottles regularly for signs of wear or damage.
By following these steps, you can maintain safe bottle hygiene and extend the lifespan of your baby’s feeding equipment.
Frequently Asked Questions About Baby Bottle Sterilization Properly
Do I need to sterilize baby bottles after every use?
Not always. Daily sterilization is generally recommended for newborns, premature babies, and infants with weakened immune systems. Older healthy babies usually need thoroughly washed bottles, with sterilization done regularly or after illness.
Can I sterilize plastic baby bottles safely?
Yes. Most BPA-free plastic bottles are designed for sterilization. Always follow the manufacturer’s instructions to avoid heat damage.
How long do sterilized baby bottles stay sterile?
If stored in a clean, closed sterilizer or sealed container, bottles generally remain sterile for up to 24 hours. Once handled or exposed to open air, they should be used promptly.
Is boiling better than using a steam sterilizer for baby bottles?
Both methods are effective. Boiling is inexpensive and widely available, while electric steam sterilizers are faster and more convenient for everyday use.
Can I use a dishwasher instead of sterilizing baby bottles?
A dishwasher can clean bottles effectively, especially if it has a sanitizing cycle. However, for newborns, regular sterilization is still recommended during the first few months.
When can I stop sterilizing baby bottles regularly?
Many parents reduce regular sterilization after their baby reaches about 3 months, provided the baby is healthy and bottles are washed thoroughly after every use. Follow your pediatrician’s advice if your baby has special health needs.
Final Thoughts on How to Sterilize Baby Bottles Properly
Knowing how to sterilize baby bottles properly at home is an important part of creating a safe feeding routine for your baby. While washing removes visible dirt and milk residue, sterilization provides extra protection by reducing harmful germs that may remain on feeding equipment.
Whether you choose boiling water, an electric steam sterilizer, a microwave sterilizer, or a UV sterilizer, the most important step is consistency. Clean and properly sterilized bottles help support your baby’s health, especially during the first months of life when their immune system is still developing.
By following the methods and tips shared in this guide, you can confidently keep your baby’s bottles clean, hygienic, and ready for every feeding.