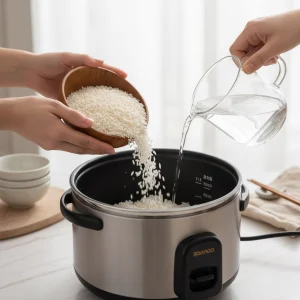
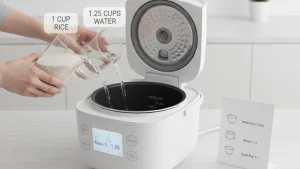
How do you get perfectly cooked rice in a rice cooker? I realized I needed to figure this out the morning my usual batch came out sticky and uneven. Understanding the rice to water ratio rice cooker makes all the difference in achieving consistently fluffy, tender grains. My reliable appliance suddenly felt less dependable, but like many home cooks, I use mine several times a week, so I quickly learned the right proportions are key. Over time, the natural starches and moisture in the grains, combined with how much liquid I add, make a noticeable difference. A few simple measurements, a little patience, and knowing a few tricks can turn an average batch into perfect rice every time. In this guide, I’ll share my personal routine, measurements, and practical advice so you never have to second-guess your rice again.

What You’ll Learn in This Guide
-
How to measure grains accurately, even without the rice cooker cup
-
My favorite liquid-to-grain ratios for different amounts
-
The role of rinsing in perfect texture
-
How to make sticky or soft rice
-
Calculating servings for your household
-
Replacement tips if you lose the original measuring cup
-
Troubleshooting common cooking issues
Why Measuring Accurately Matters
I’ve cooked rice hundreds of times, and I’ve noticed that even a little too much liquid can lead to soggy grains, while too little results in dryness. Most machines include a small measuring cup and markings inside the pot to guide you—but if yours is lost or misplaced, don’t worry.
A standard rice cooker cup is typically ¾ of a regular measuring cup, and the corresponding lines in the cooker’s inner pot indicate how much liquid to add. Understanding this simple relationship ensures your batch comes out evenly cooked, whether you’re making two servings or eight.
Measuring Grains Without the Rice Cooker Cup
If your original cup is missing, you can use a regular measuring cup instead:
-
¾ cup of dry rice = 1 rice cooker cup
-
Each measurement yields roughly two servings of cooked rice
-
Simply match the liquid according to the corresponding markings in the pot
This simple substitution works across most brands and models, so you don’t need a replacement cup immediately.
Rice-to-Liquid Ratios I Use

Here’s the basic formula I follow in my kitchen, adjusted for the plastic cup system or standard measuring cups:
| Cups of Rice | Dry Rice (Standard Cup) | Water Level | Servings |
|---|---|---|---|
| 1 | ¾ cup | 1 cup line | 2 |
| 2 | 1½ cups | 2 cups line | 4 |
| 3 | 2¼ cups | 3 cups line | 6 |
| 4 | 3 cups | 4 cups line | 8 |
Tip: When unsure, slightly reduce the liquid; you can always add a bit more if the grains aren’t fully cooked.
To Rinse or Not to Rinse
I always rinse my grains under cold water before cooking. This small step removes excess starch and prevents stickiness. Personally, I prefer the texture of rinsed rice because it stays light and fluffy.
Skipping the rinse produces a stickier outcome—some describe it as mushy or wet. But if sticky rice is your goal, leave the grains unwashed, and you’ll have the perfect texture for sushi, rice balls, or desserts.
Step-by-Step Cooking Process
Here’s how I cook my rice for consistently good results:
-
Measure the Rice – Whether using the original cup or a standard one, I make sure to measure precisely.
-
Rinse (Optional) – Rinsing under cold water until it runs mostly clear removes excess starch.
-
Add to Cooker – Placing the grains in the pot ensures even cooking.
-
Fill With Liquid – I follow the marked lines inside the pot, matching the number of cups of rice.
-
Cook – Close the lid, select the appropriate program, or press start.
-
Rest – Once the cooker signals completion, I let the rice sit for 5 minutes before fluffing.
-
Fluff and Serve – A spatula helps separate the grains, releasing steam and preventing clumping.
Making Sticky Rice
If I want sticky rice, I skip the rinse. The starch remains, producing the sticky texture needed for certain recipes. The amount of liquid remains the same; no adjustments are necessary.
Portion Control: Rice Per Person
For planning meals, I use the simple rule:
-
1 rice cooker cup = 2 servings
-
¾ cup of dry rice = 2 servings if you’re using a standard measuring cup
This makes scaling recipes easy for small families or larger gatherings.
Replacing a Lost Rice Cooker Cup
Losing the plastic measuring cup is a common issue. Luckily, all standard replacement cups are nearly identical in size. You can buy them cheaply online or just rely on regular measuring cups, as I often do.
Tip: Keep a spare in the kitchen to save time and avoid guesswork when preparing meals.
Troubleshooting Common Issues
Even with a reliable cooker, issues can happen. Here’s what I’ve learned:
-
Rice too sticky: Reduce liquid slightly or rinse thoroughly before cooking.
-
Rice too dry: Add a splash more liquid and let it sit for a few extra minutes.
-
Uneven cooking: Ensure the grains are evenly spread in the pot.
-
Lost cup confusion: Remember the ¾ cup = 1 rice cooker cup rule.
Recommended Rice Cookers
I’ve tried several over the years. My favorites:
-
Budget-Friendly: Cooks up to 3 cups, simple and effective.
-
Digital Automatic: Handles 2–8 cups with multiple cooking modes. Perfect for meal prep.
-
High-End Automatic: Fully programmable with consistent, perfect results every time.
For a more detailed guide, you can check out my Better Rice Cooker article.
Additional Tips for Perfect Rice
-
Avoid lifting the lid mid-cook – Steam is essential for even cooking.
-
Let the rice rest – A few minutes after cooking makes the texture softer and fluffier.
-
Fluff gently – A spatula or fork works better than stirring vigorously.
-
Experiment with grains – Brown rice, jasmine, or basmati may require slight adjustments in water and cook time.
Frequently Asked Questions About Rice Cooker Ratios
1. Can I use a regular measuring cup instead of the rice cooker cup?
Yes! I do this all the time when the original cup is missing. One standard cup is roughly equivalent to ¾ of a rice cooker cup. Just follow the water markings inside the pot to match the number of cups of rice you’re cooking, and you’ll get consistent results every time.
2. Do I need to rinse rice before cooking?
I usually rinse my rice under cold water. This removes excess starch and keeps the grains separate. However, if you prefer sticky rice for sushi, rice balls, or desserts, you can skip the rinse to preserve the natural starchiness.
3. How many servings does one cup of rice make?
In my experience, one rice cooker cup of dry rice yields about two servings. This is the same whether you use the original cup or a standard measuring cup. For larger meals, just scale up using the water line markings inside the pot.
4. What do I do if my rice cooker doesn’t have water lines?
No worries. Use the 2:1 water-to-rice ratio by volume. For every ¾ cup of dry rice, add 1½ cups of water. This works well with most standard white rice varieties.
5. Can I make brown rice in my cooker using the same ratio?
Brown rice absorbs more liquid and takes longer to cook. I usually increase the water slightly—around 1¾ cups of water for every ¾ cup of dry rice—and let it cook fully. Some cookers even have a brown rice program, which I highly recommend for best texture.
6. How do I fix soggy or dry rice?
Soggy rice often means too much liquid or overcooking. I usually let the rice rest with the lid off for a few minutes to let some steam escape. Dry rice means a bit more water is needed, or the grains weren’t fully spread in the pot. Fluffing gently also helps distribute moisture evenly.
7. Can I cook sticky rice in a rice cooker?
Absolutely! For sticky rice, I skip rinsing. Keep the water-to-rice ratio the same, and you’ll get soft, sticky grains perfect for Asian dishes or desserts.
Final Thoughts
Getting the rice to water ratio rice cooker right doesn’t need to be complicated. A simple measuring routine, optional rinse, and following the cooker’s water markings are enough for consistent results. A little patience and attention to detail yield fluffy, tender rice every time—and you’ll never have to worry about miscalculating servings or liquid levels again..