How to use Ninja Blender to its full potential can save you time and effort in the kitchen. If you’ve ever wanted to make smoothies, soups, sauces, or even nut butters with less effort, this powerful appliance is a game-changer. When I first started using my Ninja, I didn’t realize how versatile it truly was. Over time, it became one of my most-used kitchen tools — perfect not just for drinks, but also for meal prep, snacks, and even desserts.
In this guide, I’ll walk you through everything I’ve learned about using this powerhouse of a blender — from setup to creative recipes — so you can get the best performance every single time.
Why This Appliance Deserves a Spot on Your Counter
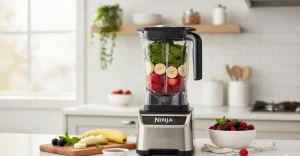
At first glance, it might seem like just another blender. But what sets this one apart is how efficiently it handles different textures. It can crush ice, puree cooked veggies, and whip up creamy smoothies all in a matter of seconds.
The design is simple yet smart: a sturdy motor base, an interchangeable pitcher or cup, and a sharp blade assembly that tackles almost anything. Whether you’re new to blending or upgrading your current setup, this machine makes cooking faster, easier, and a bit more fun.
Why Learn How to Use a Ninja Blender Properly
Learning how to use a Ninja blender the right way can make a big difference in your daily cooking. When you understand how each function works, you get smoother blends, better flavor, and a longer-lasting appliance. It also saves time and keeps your kitchen routine simple and safe.
Using a high-powered blender isn’t just about hitting the start button. Each setting — from Pulse to Blend — has a purpose. Knowing when and how to use them helps you make everything from smoothies and sauces to soups and spreads with perfect consistency every time.
1. Better Texture and Flavor
The biggest advantage of using your Ninja blender properly is the texture. If you want silky smoothies, creamy soups, or lump-free sauces, choosing the right setting matters. For example, use the Smoothie mode for fruits and liquids, or the Pulse option for chunkier mixes like salsa or pesto. A little practice helps you control the results — no more guessing or over-blending.
2. Longer Blender Life
Your blender works hard every time you turn it on. Overfilling the cup, blending for too long, or forcing tough ingredients can wear it out faster. Learning how to blend correctly reduces motor strain and keeps your blades sharp for longer. Think of it as regular maintenance that saves you money down the road.
3. Safety and Ease of Use
Using your Ninja blender correctly also means safer blending. Always make sure the lid is locked, the base is stable, and the pitcher isn’t overfilled. Once you get used to the setup, it becomes second nature — and cleaning is faster too. A well-handled blender doesn’t just perform better; it makes your kitchen feel more organized and stress-free.
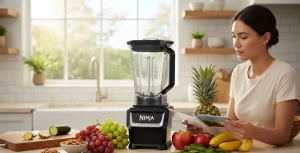
Understanding the Controls and Functions
Before diving in, it helps to know what each control does. Depending on your model, you might see a few different modes or presets. Here’s a quick rundown of what they mean and how to apply them effectively.
- Pulse: Gives you short bursts of power, perfect for chopping veggies, nuts, or even crushing ice.
- Blend: Great for smoothies, soups, and sauces that need a silky texture.
- Extract: Designed to break down fruits, seeds, and leafy greens for nutrient-rich drinks.
- Spread: Ideal for making thick dips, spreads, or nut butters.
These modes aren’t just buttons — they’re shortcuts that help you get better textures without overworking your appliance. Once you understand how they behave, you can mix and match settings depending on what you’re making.
How to Use It Step by Step
When I first started, I learned that technique matters just as much as what goes into your mix. Here’s my tried-and-tested process that keeps blending smoothly and hassle-free.
1. Set Up Properly
Place the machine on a flat, stable surface to prevent vibration or slipping. Make sure all parts are clean and dry before assembling. Attach the pitcher or cup securely to the base, then fit the blades in place. Always double-check the lid lock — trust me, it’s one small detail that prevents big messes later.
2. Add Ingredients in the Right Order
Layering your components properly makes all the difference. Start with liquids (like milk, juice, or water), then add softer items such as yogurt or fresh fruits, and finish with heavier or frozen ingredients. This order allows the blades to move freely and blend everything evenly.
Also, pay attention to the “max fill” line. It’s tempting to overfill, but leaving space at the top gives ingredients room to circulate, creating smoother blends.
3. Choose the Right Setting
Not all blends are created equal. Apply shorter bursts for chunky dips or salsas, and longer cycles for silky drinks or soups.
For example:
- Pulse a few times for chopped veggies.
- Select the blending mode for smoothies or sauces.
- Extract mode gives you ultra-smooth juices or purees.
- Spread mode is perfect for nut butters or thick dips.
If you’re working with tougher foods (like frozen fruits or ice), let the machine rest for a few seconds between cycles. This keeps the motor cool and extends its lifespan.
4. Blend Gradually
Instead of starting at the highest speed, begin slowly and increase gradually. This prevents splashing and helps the mixture combine more evenly. I usually start at a lower power for a few seconds before switching to a stronger cycle.
If you need a chunkier texture, pulse manually instead of letting it run continuously. For a perfectly smooth blend, run it longer — usually 40 to 60 seconds is plenty for most recipes.
5. Taste and Adjust
One of my favorite parts of using this machine is how easily you can adjust as you go. If something tastes too thick, add a splash of liquid and blend again. If you prefer a stronger flavor, toss in an extra ingredient — no need to restart the whole process.
6. Serve Smart
Once you’re done blending, unplug the unit before removing the blades. Pour carefully into your cup, bowl, or storage container. The smaller blending cups are great for single servings, while the large pitcher works best for family meals or batch cooking.
Creative Ways to Use Your Blender
Over time, I’ve discovered plenty of ways to get more from this tool than just smoothies. Here are a few ideas to expand your kitchen creativity.
Smoothies and Juices
You can blend fruits, vegetables, and seeds into delicious, nutrient-packed drinks. For a creamier texture, add frozen bananas or a spoonful of nut butter.
Pro tip: Freeze portions of smoothie ingredients in advance — just toss them in, blend, and go.
Homemade Sauces
From tomato salsa to basil pesto, you can whip up fresh sauces in seconds. Adjust texture with the pulse feature — a few short bursts keep it chunky, while longer blending makes it smoother.
Nut Butters and Spreads
You can make almond, peanut, or cashew butter easily. Start with roasted nuts, pulse a few times to break them down, then switch to a longer blend with a touch of oil or honey. Within minutes, you’ll have creamy, homemade nut butter.
Soups and Purees
Blend cooked vegetables with broth for a quick and comforting soup. I often add a splash of cream or olive oil at the end for flavor. If you’re using a heat-safe model, you can even blend and warm your soup in one go.
Salad Dressings
Mix olive oil, vinegar, mustard, and herbs for easy dressings that taste fresher than store-bought versions. I usually make small batches that last a few days in the fridge.
Baking Prep
Surprisingly, you can even utilize this appliance to mix pancake batter, crush cookies for pie crusts, or whip cream. It’s faster than traditional hand mixing and maintains smooth textures.
Cleaning and Maintenance Tips
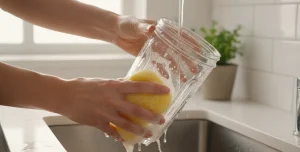
Cleaning is one of the biggest reasons people avoid using blenders, but with this model, it’s actually simple.
Here’s my go-to method:
- Fill halfway with warm water.
- Add a drop of dish soap.
- Blend for 20–30 seconds.
- Rinse thoroughly and air dry.
For deep cleaning, remove the blades and wash them separately. Most parts (except the motor base) are dishwasher-safe, but I still prefer hand washing to keep them in top shape.
Keep It Running Like New
- Always dry all parts completely before reassembling.
- Avoid blending extremely hot liquids unless your model is designed for it.
- Don’t overfill or overload the motor.
- Check blade sharpness every few months — dull blades can strain the engine.
These small steps keep your appliance efficient for years.
Troubleshooting Common Issues

Even great machines sometimes require a little troubleshooting. Here’s what I’ve learned:
- It won’t start: Ensure everything is securely in place. The safety lock prevents it from running if parts aren’t aligned.
- Loud noise or shaking: The load might be uneven — stop, stir, and start again.
- Thick or uneven texture: Add a bit more liquid, or pulse in short bursts to redistribute ingredients.
- Overheating: Let it rest between blends if you’re running multiple cycles back-to-back.
Time-Saving Tips for Daily Use
Over time, I’ve built a few small habits that make blending even more efficient:
- Pre-chop ingredients: It reduces strain on the blades.
- Use ice cubes instead of frozen fruit for a lighter texture.
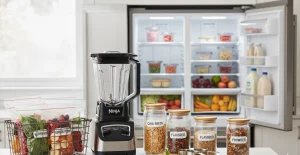
- Store base components in zip bags: Saves prep time for busy mornings.
- Clean right after operating: Dried-on residue is harder to remove later.
- Label your jars: I keep dressings, sauces, and smoothies labelled for the week — it keeps me consistent with healthy eating.
Safety First

While this is a safe and well-built appliance, it still involves sharp blades and high speeds.
A few reminders:
- Always unplug before cleaning or adjusting.
- Never reach into the pitcher with your hands.
- Keep it out of reach of children while in operation.
- Allow hot liquids to cool slightly before blending.
FAQs
1. Can I use a Ninja blender for hot liquids?
Yes, but only if your model supports it — like the Ninja Foodi Hot & Cold Blender. For other models, let liquids cool before blending.
2. How long should I blend for a smoothie?
Blend for 30–60 seconds or until smooth. Use Pulse first for frozen fruit, then switch to Blend mode for a creamy texture.
3. What’s the difference between Extract and Blend mode?
Extract breaks down ingredients for nutrient-rich drinks, while Blend creates smoother results like soups and sauces.
4. Can I wash the blades in a dishwasher?
Yes, most blades are dishwasher-safe. Place them on the top rack or wash by hand with warm, soapy water.
5. How do I make nut butter in a Ninja blender?
Add roasted nuts, use the Spread or Puree setting, and blend for 2–3 minutes until creamy. Scrape sides if needed.
Final Thoughts
What I love most about this appliance is how it blends convenience with creativity. The SharkNinja design philosophy truly makes it stand out among modern kitchen tools Whether you’re a busy professional, a parent, or someone exploring healthier meals, it can adapt to your lifestyle. Once you understand how to operate it efficiently—layering your components, selecting the right mode, and maintaining it—you’ll realise how much time and effort it saves in daily cooking.
So go ahead and experiment — try that green smoothie, creamy soup, or homemade nut butter. With a little practice, this kitchen essential will become your go-to for quick, delicious, and fresh meals.