When I first brought home my air fryer, I felt like I had unlocked the holy grail of fast, healthier cooking. I started making everything from sweet potato fries to crispy chicken wings without drowning them in oil. But as the weeks went by, I noticed something strange: the inside of my air fryer didn’t smell as fresh as it used to. My snacks tasted a bit off, and no matter how quickly I rinsed the basket, the weird odor stuck around. That’s when it hit me—I wasn’t actually cleaning my air fryer. I was just rinsing it and hoping for the best.
If you’ve ever been in the same situation, I get you. Cleaning an air fryer isn’t obvious at first. It’s not just a removable basket like a toaster oven or a dish you can dump in soapy water. There are hidden crevices, sticky grease that seems cemented on, and let’s not forget—the heating coil. The first time I learned how to clean an air fryer properly, it was honestly a little eye-opening. But now, it’s part of my regular kitchen rhythm, just like washing dishes or wiping the counters. And I’m here to walk you through the exact steps I use, the tools you’ll need, and the mistakes to avoid so your meals taste fresh and your air fryer lasts longer.
Why Cleaning an Air Fryer Matters (And How I Found Out the Hard Way)
In the beginning, I would just dump out crumbs, run the basket under tap water, and call it a day. It wasn’t long before I noticed issues: smoke during preheat, funky smells, and food tasting slightly stale. That’s when I realized regular clean-up is necessary—not just for the sake of hygiene, but also for making sure every batch of fries, roasted veggies, or chicken wings turns out perfect.
If your air fryer has ever smoked or smelled like leftover salmon from last week, no judgment—I’ve been there too. Let’s make sure neither of us ends up with burnt crumbs or hidden grease haunting our favorite appliance again.
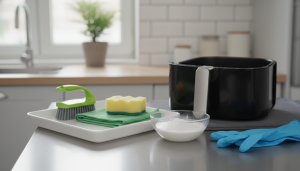
What You’ll Need Before You Start Cleaning
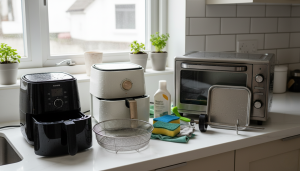
You don’t need expensive cleaning sprays or fancy gadgets to clean an air fryer correctly. Here’s what I personally keep on hand every time:
- Warm water
- Mild dishwashing liquid
- Non-scratch sponge or cloth
- Soft bristle brush or old toothbrush
- Baking soda (for tougher buildup)
- Microfiber towel or drying rack
Trust me, once you have these ready, cleaning becomes less of a task and more like a step you just do automatically after cooking.
How to Clean an Air Fryer (Step-by-Step)
1. Unplug and Cool Down
Every time I use my air fryer, the first thing I do before cleaning is unplug it and wait for it to cool down. Not only is this safe, but it also helps the grease settle so it’s easier to see and wipe off.
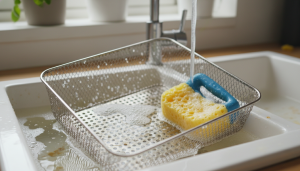
2. Take Out the Basket and Tray
Once it’s cooled, I remove the basket and tray and let them soak in warm, soapy water for about 15 minutes. This softens grease and stuck residue. After soaking, I scrub it gently with a soft sponge or brush.
💡 Pro Tip: If food is really stuck on, I make a paste with baking soda and a few drops of water, gently rub it on the spot, and let it sit before scrubbing. Works like magic.
3. Clean the Main Unit Interior
You should never submerge the air fryer body in water. I simply wipe it inside and outside with a damp cloth and a drop of dish soap. For small, stubborn bits around the corners, I use a soft toothbrush.
⚠️ Reminder: Be careful around the heating element—just enough moisture to clean, not enough to soak anything.
4. Clean the Heating Element (Gently)
Flipping the air fryer upside down, I check the heating coil inside. If there’s any buildup, I gently wipe it with a sponge or soft brush. This is important if you’ve ever noticed your air fryer smoking during cooking.

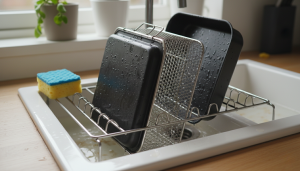
5. Dry Everything Well
Once everything is clean, I lay out the basket, tray, and accessories on a drying rack or towel. Moisture creates odors over time, so ensuring they’re fully dry before reassembling is a must.
How Often Should You Clean Your Air Fryer?
Here’s what works for me:
| Cleaning Frequency | Task |
|---|---|
| After every use | Wash basket and tray, wipe unit |
| Once a week | Brush out heating element area |
| Once a month | Deep clean inside and vents |
Following this rhythm has honestly saved my air fryer from becoming a sad, smelly gadget shoved in the back of the cabinet.
Deep Cleaning an Air Fryer: When It Needs Extra Love
If you cook fatty foods often (like bacon or drumsticks), a surface-level clean won’t cut it every time. Here’s my process for a deep scrub:
- Make a thicker baking soda paste and use it on any tough stains.
- Use diluted vinegar or lemon juice to wipe down inside surfaces—great for deodorizing.
- Use a brush to scrub air vents and small grooves where crumbs like to camp out.
Fixing Common Issues During Air Fryer Cleaning
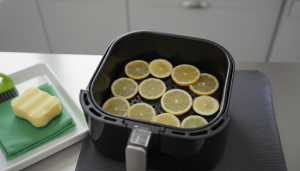
Unwanted Smells
If the air fryer still smells, I wipe the basket and tray with lemon juice or vinegar, then air fryer a few lemon slices for 2 minutes at low heat. Instant freshness boost.
Smoke in the Air Fryer
Leftover crumbs or grease can cause smoke. Give a good scrub under the tray and check vents.
Grease That Won’t Budge
Baking soda paste + patience = solved.

Kitchen Tip: Make Greener Choices While You Clean
If you’re into kitchen sustainability like I am, consider how your cleaning methods impact the planet too. I switched to earth-friendly dish soap and reused microfiber cloths instead of wasteful paper towels. If you’re curious about other planet-friendly kitchen habits, I shared more in my review of eco-friendly dishwashers here:
🔗 Eco-Friendly Dishwashers – My Guide to Greener Cleaning
And if you’re like me and love trying energy-saving appliances, you might love my roundup on the latest bread makers that are efficient and stylish:
🔗 Top Bread Makers 2025 Review – Tested & Ranked
Final Thoughts
Learning how to clean an air fryer the right way honestly changed how I cook with mine. I used to treat cleaning like an optional step, but now I look at it as part of the recipe. A clean air fryer isn’t just nicer to look at—it makes food taste better, helps meals cook evenly, and protects your investment long-term. So now that you know the steps, tools, and tricks, trust me: it just gets easier each time. Your food—and nose—will thank you.