If you’ve ever tried holding a camera while racing down a mountain trail or cruising along city streets, you already know two things:
- It’s risky.
- Your footage ends up shaky, chaotic, and unusable.
That’s where a GoPro mount comes in. This little gadget completely changes how you record your adventures. I’ve used mine for biking, snowboarding, and even kayaking, and it’s transformed my footage from a wobbly mess into smooth, immersive videos.
Before we jump in, here’s what you’ll learn in this guide:
- What a GoPro mount does and why I recommend it
- Different types of attachments and how to choose one
- Step-by-step instructions to set it up safely
- Practical tips for stable, professional-looking videos
- Safety and legal considerations you shouldn’t ignore
- Common mistakes I’ve made—and how to avoid them
- How I personally use my setup across different activities
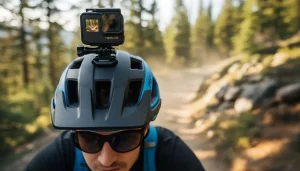
Why I Started Using a GoPro Attachment
I first tried this setup during a weekend mountain bike ride. My hands were free, I could focus on the trail, and yet my GoPro captured every turn, jump, and near miss. It was a game-changer.
Here’s why I stick to this approach:
- Hands-free recording: No more awkward balancing acts or risking dropping the camera.
- Smooth motion: The head’s natural stability reduces shake.
- Immersive perspective: The videos show exactly what I see, making viewers feel like they’re riding alongside me.
- Versatility: Works for biking, skiing, kayaking, and even casual city walks.
Understanding Different Types of Mounts
Over the years, I’ve experimented with nearly every attachment style. Each has its pros and cons, depending on the activity and your gopro helmet mount type.
Adhesive Options
These use a sticky pad to attach directly to the shell.
- Advantages: Low profile, light, and generally stable if applied correctly.
- Drawbacks: Placement is permanent once it sticks.
- Tip from experience: Clean the surface thoroughly and let it cure for at least 24 hours. My impatience once cost me a GoPro mid-ride.
Strap or Chin Attachments
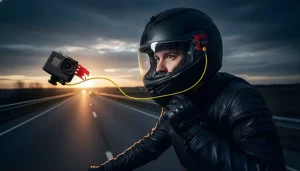
I personally prefer this for motorcycle rides. It sits near chin level, providing a centered, natural point of view.
- Advantages: Balanced, wind-resistant, and immersive.
- Drawbacks: Some helmets require slight adjustments for proper fit.
This setup often produces footage that feels like the viewer is riding with you, not just watching from afar.
Vent or Frame Straps
For GoPro helmet mounts with vents (like ski or cycling gear), a strap threaded through openings works well.
- Advantages: No adhesive residue, reusable, simple to adjust.
- Drawbacks: Slightly less secure in high-vibration situations.
For casual or moderate-speed rides, these are easy and flexible.
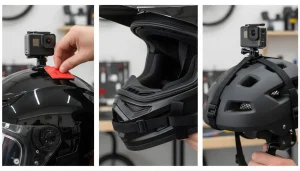
How I Set Up My GoPro for Smooth Footage
Mounting a camera incorrectly is a rookie mistake I’ve learned to avoid. Here’s my method:
- Pick the Right Spot: Decide if you want eye-level, side-angle, or overhead shots.
- Clean the Surface: Dirt, oil, or wax will compromise adhesion. I use rubbing alcohol for best results.
- Attach Carefully: Press adhesive mounts firmly. If using straps, ensure they are evenly tightened.
- Adjust the Angle: Point slightly downward for the horizon; otherwise, your video may capture mostly sky or ground.
- Use a Safety Tether: Even high-quality adhesives can fail. A thin cord can save your camera from disaster.
Choosing the Best Position for Each Activity
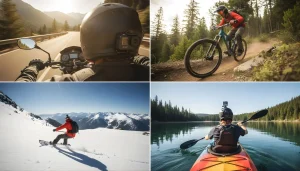
Different activities benefit from different mounting spots:
- Motorcycling or biking: Chin or front attachments give a realistic POV with minimal drag.
- Mountain biking or hiking: Side attachments capture dynamic motion and trail interaction.
- Snowboarding or skiing: Overhead positions provide sweeping landscape views.
- Water sports: Strap mounts or adhesive on waterproof helmets keep the camera secure.
Over time, I’ve learned that testing each spot before a full session prevents wasted footage. Short practice rides save hours of frustration.
Tips for Capturing the Best Footage
Here are the tricks I rely on to get cinematic results:
- Enable stabilization: Features like HyperSmooth make a huge difference.
- Select proper frame rate: Standard 30–60 fps for general footage; 120 fps+ for slow-motion.
- Test before long rides: A short clip lets me adjust the angle or reposition the device.
- Reduce wind noise: Consider a mic muffler or external mic for high-speed activities.
- Include part of your helmet or gear: A small visual cue adds depth and realism.
- Keep backups handy: Extra adhesive pads, straps, or memory cards have saved me multiple times.
If you want more on organizing your gear efficiently, check out my guide on best travel accessories.
Safety and Legal Considerations
This part isn’t as exciting as filming, but it’s critical. Improper mounting can affect safety and even violate local laws.
- Some competitions or events restrict helmet-mounted cameras. Always verify regulations first.
- Heavily modified GoPro helmet mounts may compromise safety standards. Stick to certified gear.
- Check the mount and GoPro helmet mount interface regularly—adhesive bonds degrade over time with heat, cold, or repeated stress.
One tip from personal experience: never skip inspecting your setup before each ride. It’s a small habit that prevents big accidents.
Mistakes I’ve Made and How You Can Avoid Them
- Rushing installation: Adhesive takes time. I learned the hard way by testing mine too soon.
- Ignoring surface texture: Stickers or curves can reduce adhesion. Opt for smoother areas or use straps.
- Overlooking wind drag: Top-mounted cameras can lift slightly at high speeds. Consider front or side positions.
- Skipping angle checks: Misaligned footage can ruin hours of riding. Short test videos help.
- No backup tether: Even minor failures can cost a camera (or helmet).
By following these lessons, I’ve avoided most disasters—though there are still stories I wouldn’t want to repeat.
Real-World Scenarios: How I Use My Setup
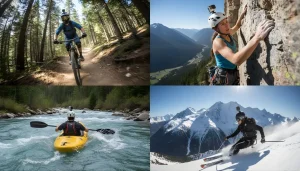
I’ve used my GoPro in dozens of settings, and each has its quirks:
- Motorcycle rides: Chin mount captures road, scenery, and rider movements.
- Mountain biking: Side or front angles catch both trail and body action.
- Snowboarding: Top or side views capture snow expanses beautifully.
- Water sports: Strap mounts on vented helmets keep cameras stable in wet conditions.
Experimenting with each activity helped me figure out the perfect angles for consistent, high-quality footage.
Maintenance Tips
A GoPro attachment needs care to last:
- Clean mounts after muddy or wet sessions.
- Inspect adhesive and straps for wear or cracks.
- Avoid long-term exposure to heat or sun.
- Replace worn components promptly.
I treat my gear like a small investment—it saves time, money, and headaches in the long run.
Extra Ideas to Enhance Your Footage
- Try slow-motion sequences for jumps or sharp turns.
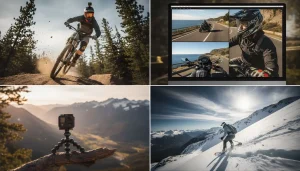
- Capture helmet POV combined with chest or bike-mounted cameras for multi-angle editing.
- Use a small, portable tripod to stabilize when you stop for a scenic shot.
- Time-lapse sequences from the helmet can add creative flair.
These little additions make your videos more engaging and professional without extra bulk.
Frequently Asked Questions About GoPro Helmet Mounts
Q1: Can I use this on any helmet?
Not quite. Most mounts work best on smooth, non-textured surfaces. Full-face motorcycle helmets, cycling helmets, or ski helmets are ideal. Vent-heavy or highly curved helmets may require straps or alternative setups. I learned the hard way that ignoring your helmet’s shape can result in shaky footage—or worse, a lost camera.
Q2: How long should I wait before riding after installing adhesive mounts?
Patience pays off. I always let adhesives cure for at least 24 hours. Applying the mount and hitting the road immediately increases the risk of detachment. Trust me, it’s worth the wait for peace of mind and stable footage.
Q3: What’s the best position for capturing action footage?
It depends on the activity. For motorcycles or biking, I prefer a chin or front attachment for a realistic POV. For skiing or snowboarding, top or side positions work beautifully. Experimentation is key, and I always do a short test clip before committing to a full ride.
Q4: How can I reduce wind noise in my recordings?
Wind noise can ruin a perfectly shot scene. I recommend using GoPro’s built-in wind reduction or an external mic with a muffler. In my experience, even a small wind barrier on the front mount can make a noticeable difference.
Q5: Are there legal concerns I should know about?
Yes. Some regions or racing events restrict helmet-mounted cameras, and heavily modified helmets may lose their certifications. Always verify local rules and check your helmet manufacturer’s guidance. A quick legal check beforehand saves headaches later.
Q6: How do I maintain my mount for long-term use?
Regular inspection is key. Clean adhesive surfaces, check straps for wear, and replace parts exposed to sun, heat, or water. I’ve had setups last for years simply by dedicating a few minutes to maintenance after each adventure.
Final Thoughts
A properly mounted GoPro transforms the way you record your adventures. Hands-free recording, immersive angles, and smooth footage make every ride memorable. But it comes with responsibility: careful setup, adherence to safety standards, and a bit of foresight can save both your camera and your sanity.
By experimenting with different attachment points, taking test clips, and following the precautions above, you’ll capture engaging, high-quality videos that show your adventures exactly as you experience them.